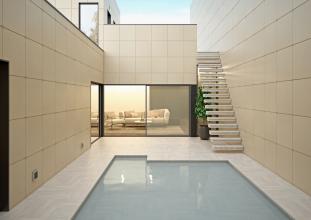
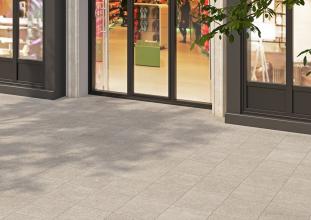
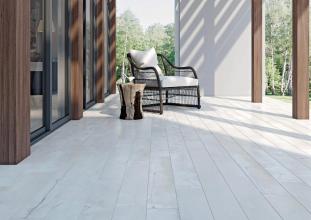
The principles of gres laying are similar to the laying of ordinary ceramic tiles. Still, there are special requirements for the choice of a tile adhesive and the quality of a work. This is due to the almost zero moisture absorption and very a high durability of the artificial stone.
Correctly installed gres will last several decades without any problems and a loss of the technical or aesthetic characteristics. Moreover, the surface will not suffer from temperature changes, impacts of heavy objects or influences of aggressive substances. Nevertheless, if there was an incorrect laying, an air space could be formed under the tile, and it is possible that the covering would crack during the first months of exploitation. Thus, the quality of the gres surface largely depends on how it was installed
Methods of installing
You can lay gres tile traditionally with the formation of standard joints or jointless. Formation of the joints is the most common and simplest method. You can do it by yourself.
Before starting the work with gres tiles, it is necessary to define the design project in advance (it is the best to depict the exact scheme of laying in the scale), and to buy material with enough reserve.
Choosing the tile adhesive
Experts do not recommend laying the gres tile on a simple mortar of cement. It does not provide the necessary strength and reliable contact of materials. For this purpose, it is convenient to use special adhesive mixtures, especially for the gres tiles with high adhesion and durability. Special mixtures with high elasticity, frost or heat resistance, minimum water absorption, etc. are better to use in special conditions: facing fireplaces, outdoors, damp locations and public buildings, as well as installation on deforming surfaces (for example gypsum board).
When the tile is put on a cement base or bonded screed in the living areas, use cement adhesive for gres with polymer additives. Nevertheless, if you have specific conditions, you will need to use more expensive types of specialized polyurethane or dispersion adhesive.
Tools for the gres installation
The following materials and tools will be required for the work with gres tiles:
• a container for the dilution of the adhesive and a mixer drill;
• a tape-measure or a ruler;
• a builder's level and a cord;
• a tile cutter of an angle grinder with a diamond disk;
• a straight or serrated spatula for the application of the adhesive;
• tile spacers for the tile joints;
• a rubber hammer – carver's mallet;
• a rubber spatula and a mixture for joint grouting;
• a silicon sealant;
• gloves, sponge, rag.
When you choose a serrated spatula for working with gres, pay attention that it depends on the thickness and size of the tile. For example, for a 60x60 cm tile, use a spatula with the serrations’ height of 12 mm. Select the thickness of the tile spacers according to the tile size, the standard size for non-rectified gres is from 2,5 to 5 mm.
Preparation for the work
• Preparation of the base. It is important to install gres tiles on a completely flat, clean and dry surface. You should remove all protruding parts, pour a self-leveling bonded screed on the floor (small roughness can be leveled with the tile adhesive); level the walls with putty. Concrete floor and walls are treated with a primer for the appropriate material. Before the laying gres on a heat-insulated floor, test the system and switch it off until the adhesive will dry completely.
• Preparation of the tile. Check the gres for compliance with the chosen grade and caliber.
During the work, it is recommended using material from different packages to achieve the best harmony of tones!
Technology of the gres installation
• Laying out of the working space. After the surface will completely dry, you can start marking the area. Start installation from the center of the room or from the wall. If you put the tile from the center of the floor, use a cord to mark the diagonal or horizontal middle line and place the first row of the tiles under it. This is done in order to other tiles can be placed symmetrically to the right and to the left side. Cutting tiles in that way are evenly spread out along the edges next to the walls.
• Tile placing. First, it will be useful to put the tiles on a dry surface. This will help you to check the conformity of tone, the caliber and the grade of the tiles. To ensure the uniformity of the pattern, it is recommended using a tile straight from the several packages.
• Preparation of the mortar. Dry mixture for the gres is diluted with the water and poured by a mixer drill. Prepare it in small batches, taking into account the fact that the adhesive working time is only a few hours.
• Application of the adhesive. Gres is better to lay at indoor temperature (from +10 to +30 °C). Put the adhesive both on the base surface and on the tile itself (with a thinner layer). Pay attention that the mortar is the first aligned with a straight and then a serrated spatula inclined at an angle of 45 °. Recommended height of the adhesive layer on the base surface is 4-5 mm. Setting time of the adhesive mixture is during 10-15 minutes. At one time, cover no more than 1 m² of floor or wall surface.
• Tile installation. Place the tile accurately on the rib, set against the previous tile or a wall and slowly plunge it into the mortar. Then, the tile is leveled slightly by tile spacers. Tiles of large size can be installed using a special handle on suction cups.
• Tile leveling. Press the laid tiles evenly to the surface, tap with a rubber hammer and sunk into the adhesive. Check the horizontality of the covering with the help of a builder's level. If the tiles are laid on the wall, the work is controlled using an adjusting tool. You can change the position of the tile only within the first 10 minutes. Then, remove the excess of the adhesive and clean the joints between the tiles.
• Installation of the next tile. In the case of interruptions in work, remember that the laid earlier gres has a slight settling (<1 mm). During the walls facing, put the next row when the adhesive under the bottom tile has set a little.
• Tile cutting. If necessary, the tiles near the walls or other obstacles are cut off with tile cutter or with the help of the angle grinder.
• Grouting. Leave the gres for a day, so that the adhesive will dry a bit and then grout the joints. To do this, remove the tile spacers and clean up the joints, dilute the grout mixture with the water and apply it with a rubber spatula. Do not forget to make sure that the excess grout is removed from the tile joints. When the grout mix will set, clean the ceramic tiles up with a sponge or a rag. The tile joints on the walls and other obstacles is fulfilled with a silicone sealant.
• Completion of the work. The adhesive will dry fully within 3-14 days.


